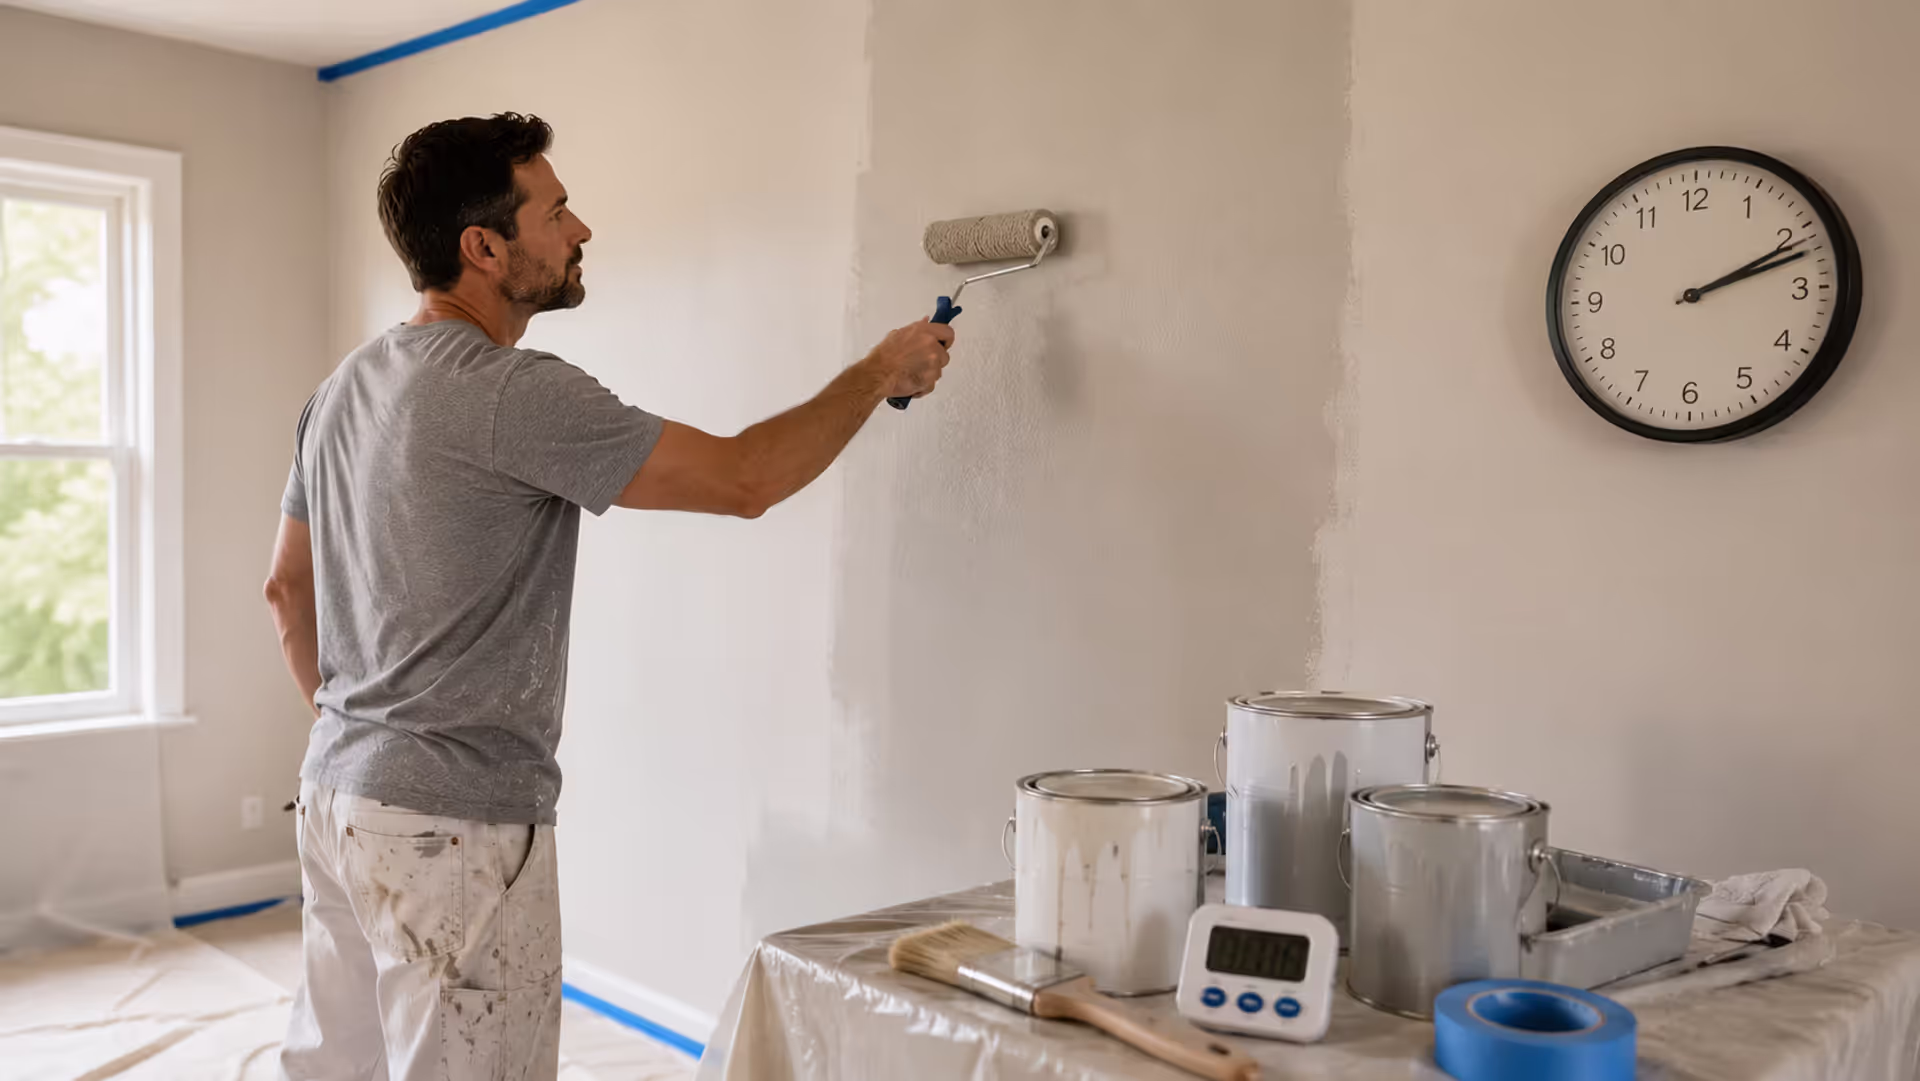
Homeowner painting a wall and monitoring drying time between coats
How Long for Paint to Dry Between Coats?

Content
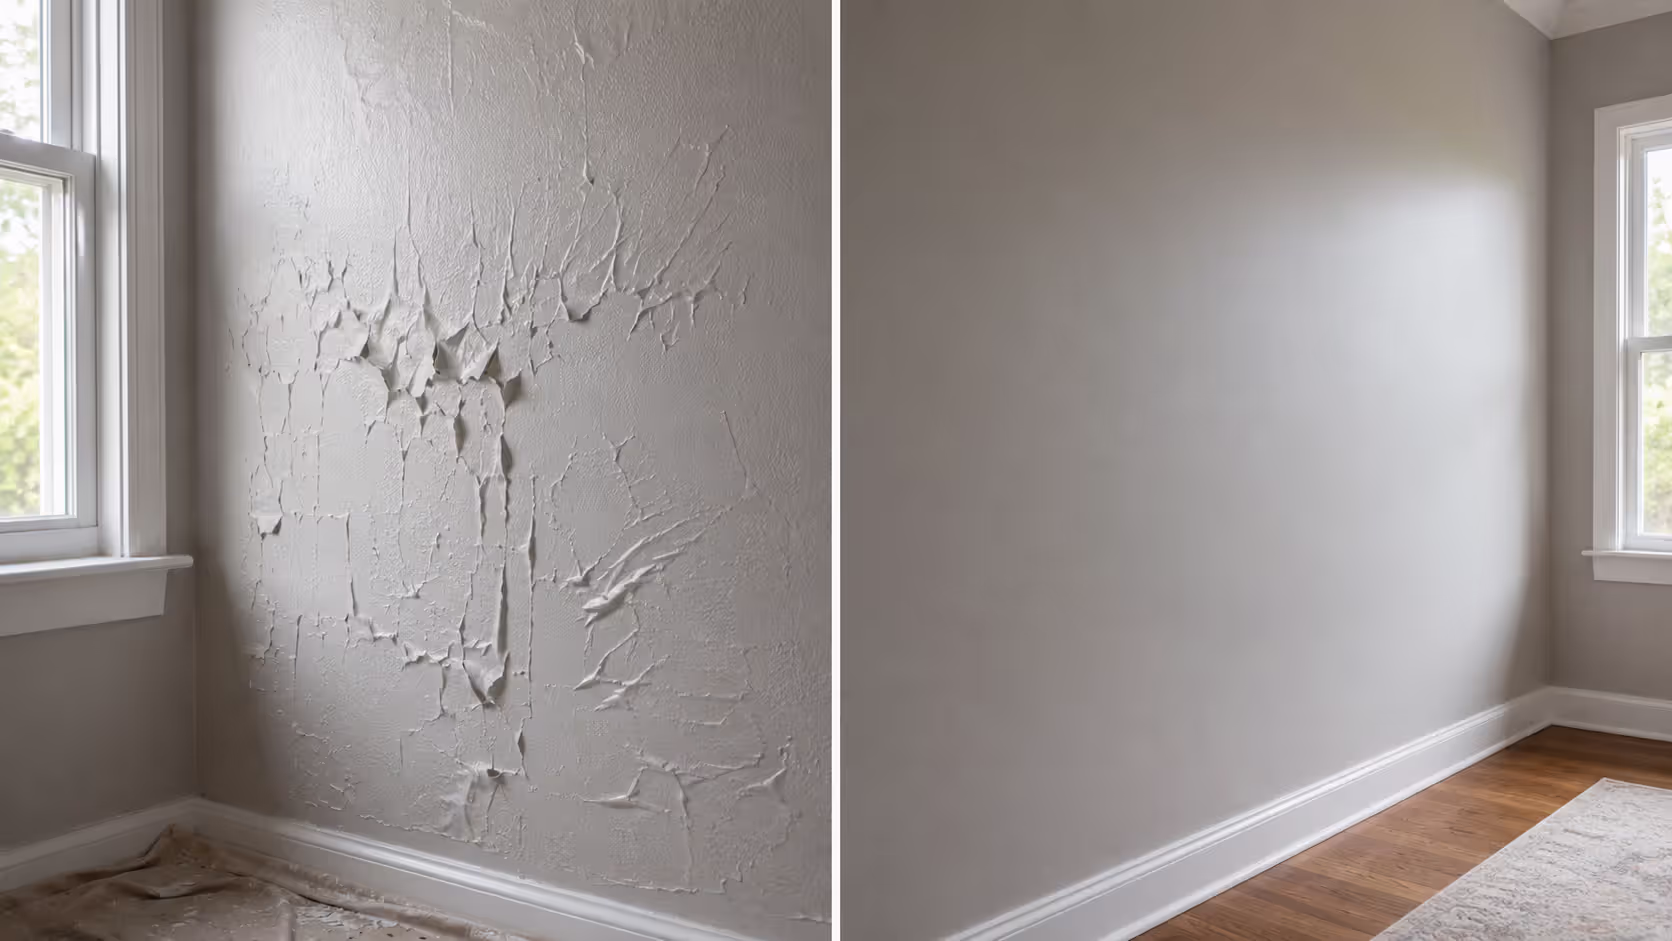
Last weekend, I watched my neighbor slap a second coat of bedroom paint on after just 45 minutes. "Looks dry to me," he shrugged. By Sunday evening, he was scraping off wrinkled, peeling patches and starting over.
The can says "recoat in 2 hours." Your contractor buddy swears by 4 hours minimum. That YouTube video claims you can go again in 60 minutes with the right conditions.
Who's actually correct?
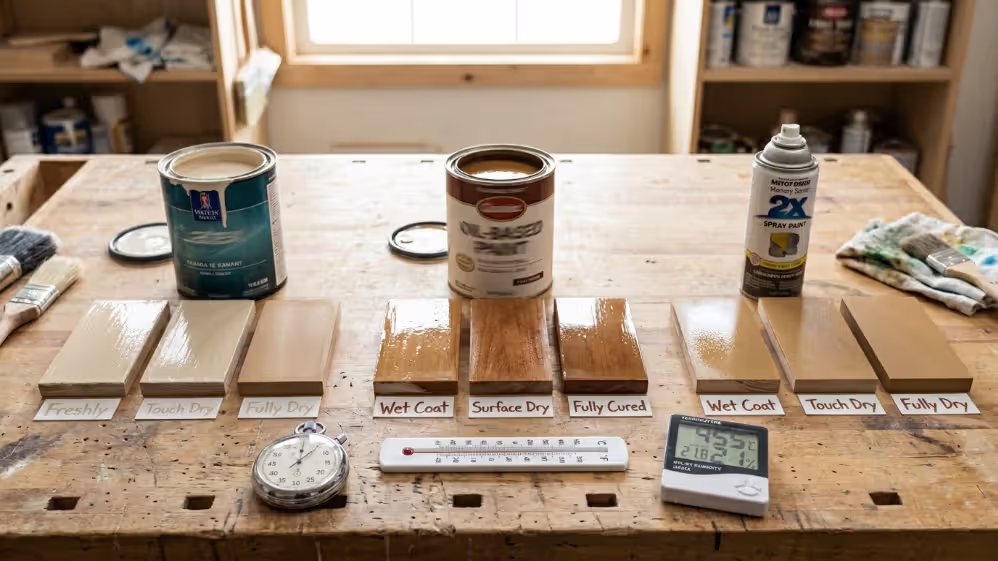
Water-based latex typically needs 2-4 hours between applications. Oil-based paint? You're looking at 6-8 hours minimum—sometimes a full 24 hours. Spray paint dries quickest, usually accepting another layer after 30-60 minutes. But here's what trips people up: that surface might feel bone-dry to your fingertips while the layers underneath are still wet.
The difference between "feels dry" and "ready for more paint" has wrecked more DIY projects than I can count.
Let me show you the actual waiting periods that prevent do-overs.
Understanding Paint Drying vs. Curing
Two completely different processes happen after you finish rolling paint onto a wall.
Drying occurs when solvents evaporate from the surface. Touch the wall—if it doesn't leave paint on your finger, drying is done. This happens relatively fast, usually within a couple hours.
Curing is the chemical hardening process happening deep in the paint film. Molecules cross-link and bond. The finish develops its final durability and resistance. This takes substantially longer—weeks, not hours.
You can apply another coat once drying completes. But the paint won't achieve full hardness until curing finishes. That's why freshly painted trim feels slightly soft for days afterward, and why you shouldn't scrub walls for at least two weeks.
How long does house paint take to dry completely? Latex finishes cure within 14-28 days. Oil-based varieties often need the full 30 days. Your local weather conditions make a massive difference.
The mistake I see constantly: people treat "ready for coat two" the same as "fully hardened." They shove furniture against walls after 48 hours, hang heavy mirrors after three days, then wonder why the finish shows dents.
Drying Times by Paint Type
Different paint formulations operate on wildly different schedules.
Author: Caleb Norton;
Source: johnhranec.com
Latex and Acrylic Paints
Water-based paints dominate residential projects for good reason. They dry quickly, clean up with soap and water, and don't gas out your house with fumes.
Touch-dry happens in 30-60 minutes under normal conditions. You can typically recoat after 2-4 hours. Some newer formulas claim recoat times as short as 60 minutes.
I still recommend caution. High humidity or thick application? Wait the full 4 hours. Better yet—if your schedule permits, wait overnight.
Complete curing takes 14-30 days. Be gentle with painted surfaces during this period.
Oil-Based Paints
Oil-based (alkyd) paints create incredibly durable, smooth finishes. Professionals still choose them for trim, doors, and kitchen cabinets. The tradeoff? Glacial drying times.
Touch-dry arrives after 6-8 hours. Recoating needs 16-24 hours minimum. Most experienced painters automatically wait 24 hours regardless of what the label claims.
Light use is safe after 3-7 days of curing. Full hardness takes up to 30 days.
These paints also require mineral spirits for cleanup and produce stronger odors. You'll need serious ventilation—which actually helps them dry faster.
Spray Paint
Aerosol paints outpace everything else because each pass lays down an ultra-thin film.
Touch-dry in 10-30 minutes. Most spray paints accept another coat in 30-60 minutes. Quick-dry formulas claim readiness in just 15 minutes.
Full curing takes 24-48 hours for typical spray paints. Specialized formulas might need up to a week.
Want to accelerate spray paint drying? Heat is your friend. Hot, dry conditions speed every phase. Applying super-thin layers also helps—four whisper-light passes outperform two heavy ones.
Here's how they compare side-by-side:
| Paint Type | Touch Dry | Recoat Time | Full Cure | Best For |
| Latex/Acrylic | 30-60 minutes | 2-4 hours | 14-30 days | Walls, ceilings, most interior surfaces |
| Oil-Based | 6-8 hours | 16-24 hours | 3-30 days | Trim, doors, cabinets, high-traffic areas |
| Spray Paint | 10-30 minutes | 30-60 minutes | 24-48 hours | Small projects, furniture, metal objects |
| Primer | 30-60 minutes | 1-3 hours | 24 hours | Preparation before topcoats |
Factors That Affect Drying Time
Those numbers above assume ideal conditions: 70°F, 50% humidity, decent airflow. Your garage in February? Not even close.

Author: Caleb Norton;
Source: johnhranec.com
Temperature controls everything. Warmer air accelerates evaporation. Most paints work best between 50°F and 85°F. Below 50°F, latex might never cure properly. Above 85°F, overly rapid drying causes cracking or adhesion problems.
Humidity is your enemy. Moisture-saturated air prevents solvents from escaping. During sticky summer weather, plan to double your wait times. Painting during a rainy week? That latex might need 6-8 hours between coats instead of 2-4.
Ventilation moves solvent-laden air away from your work surface. Open windows, run fans, keep air moving. Just don't aim fans directly at wet paint—you'll blow dust particles into the finish.
Surface type matters more than most realize. Porous materials like raw drywall or bare wood absorb paint and accelerate drying. Non-porous surfaces like previously painted walls or metal keep paint sitting on top longer.
Coat thickness causes endless problems. A heavy coat can take twice as long to dry as a thin one. Trying to get perfect coverage in one thick pass is tempting, but two thinner coats consistently work better while drying faster.
Paint quality affects performance too. Premium products contain better resins and additives that promote even drying. Cheap paint can stay tacky longer and cure unpredictably.
How to Speed Up Paint Drying
Sometimes your timeline demands that second coat today. Here's how to safely push things along.
Increase air circulation. Open windows on opposite walls to create cross-ventilation. Place fans to move air across painted surfaces without blowing straight at them. This single step delivers the biggest impact.
Lower humidity levels. Run a dehumidifier if you own one. Air conditioning helps doubly—it removes moisture while stabilizing temperature. In a pinch, a space heater can help in damp rooms, but keep it away from painted areas and monitor constantly.
Apply thinner layers. This bears repeating. Two thin coats dry faster and look better than one thick coat. Use quality rollers and brushes, and don't overload them.
Keep temperatures comfortable. Aim for 70-80°F. Don't exceed 85°F—paint can dry so fast it cracks.
Choose quick-dry formulas. Manufacturers now make rapid-dry versions of standard paints. They cost 10-20% more but can cut wait times in half.
For spray paint specifically, these methods work even better since you're already working with thin layers. Warm, dry, well-ventilated conditions can prepare surfaces for another coat in 20 minutes.
One method to avoid: hair dryers or heat guns. They sound logical but create disasters. The surface dries prematurely while underneath stays wet, causing bubbles, cracks, and poor bonding.
Common Paint Problems and How to Avoid Them
Most painting disasters trace back to one issue: rushing between coats.
Author: Caleb Norton;
Source: johnhranec.com
Why Paint Peels and How Drying Time Plays a Role
Why is my paint peeling? Often because the first coat wasn't ready when you added the second.
Fresh paint applied over insufficiently dried paint causes new solvents to re-liquefy the layer below. The bottom coat never completed drying, and now moisture is trapped between layers. As that trapped moisture tries to escape, it pushes paint away from the wall.
Other peeling causes include:
- Painting over dirty or glossy surfaces without proper prep
- Working in temperatures below 50°F
- Using exterior paint indoors (or interior paint outside) where the chemistry doesn't match conditions
- Moisture coming through the wall from behind
The fix? Remove loose paint, sand edges smooth, prime where needed, and repaint—this time respecting full recommended intervals.
Blending New Paint with Existing Paint
How to blend new paint with old paint on wall? This gets tricky because paint changes color as it ages.
Your best approach involves feathering the edges. Apply fresh paint, then use a nearly dry brush to blur where new meets old. Work quickly before it sets. This softens the visible line.
For touch-ups, use leftover original paint if you saved some. Without that, paint store color-matching helps—but expect imperfect results. The existing paint has faded and collected dirt over time.
Sometimes the obvious choice wins: repaint the entire wall. Touch-up attempts often stand out more than starting fresh, especially on walls that get lots of natural light.
Special Painting Scenarios
Certain surfaces need special consideration for drying intervals and product choice.
Author: Caleb Norton;
Source: johnhranec.com
Can you paint drop ceiling tiles? Yes, but pick the right product. Water-based latex works well on most ceiling tiles. Use thin applications—too much paint can warp tiles or reduce their acoustic properties. Allow at least 4 hours between coats, and paint them before installation when feasible.
Can you paint apartment walls? Usually, yes. Most leases allow painting if you return walls to original colors before moving out. Check your lease first. Standard latex wall paint works fine with normal drying intervals. Take photos of original colors for reference.
Can you paint ceiling fan blades? Absolutely. Clean thoroughly first, then use either spray paint or latex with a small foam roller. The key is thin applications—too much paint weight can unbalance the fan. Respect full recommended intervals between coats (1 hour for spray, 3-4 hours for latex) to prevent drips.
Can I use exterior paint on the interior? You could, but don't. Exterior formulas contain UV blockers and mildewcides that keep releasing fumes for weeks indoors. The odors are stronger and last longer. Interior paint is formulated for lower VOC output and better indoor air quality.
Impatience between coats causes more DIY paint failures than any other factor. I've watched homeowners repaint entire rooms because they couldn't wait three hours. Give paint adequate time to perform its chemistry, and you'll enjoy years of durability.
— Martinez David
FAQ: Paint Drying Questions Answered
Proper timing between coats separates professional-looking results from projects you'll redo in six months.
The basic rules are simple: wait 2-4 hours for water-based latex, 16-24 hours for oil-based formulas, and 30-60 minutes for spray paint. Adjust these windows based on your actual conditions—temperature, humidity, and airflow all significantly affect outcomes.
When in doubt, wait longer. An extra hour between coats causes zero harm. Rushing creates problems that waste days of work.
Keep work areas warm and well-ventilated. Apply thin, even layers. And resist the urge to test dryness with your finger—that fingerprint becomes permanent.
The patience you show between applications pays off in longevity and appearance. That's what separates paint jobs that impress from ones that disappoint.